Guides & Tutorials (beta)
Adding the CommandBars Control to your ToolBox
To add the CommandBars Control to your ToolBox in Visual Studio you would start by displaying the ToolBox if it is not already visible.
-
Then select View->Toolbox from the menu bar.
-
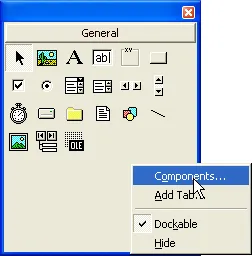
Right-Click on an open area of the ToolBox not occupied by a control and select Components… from the pop-up menu (Bottom Left).

As an alternative, you can select Project->Components from the menu bar.
-
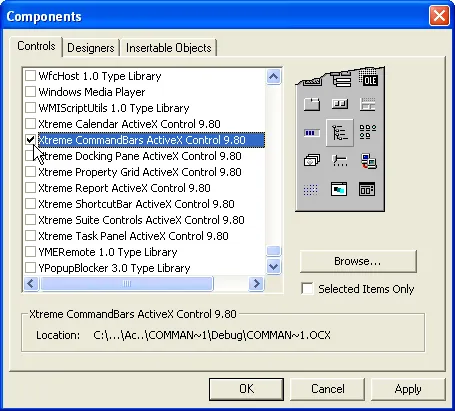
Select the Controls tab if it is not already selected and scroll down to the bottom of the list box. You should see the Command Bars ActiveX Control module, make sure that the check box is selected and click OK (Bottom Right).

-
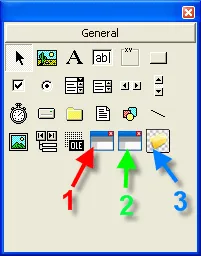
You should now have 3 new icons added to your ToolBox. The picture below shows the new icons and are numbered to make it easy to describe them:

Icon #1 is the CommandBars control. Icon #2 is the CommandBarsFrame control. Icon #3 is the ImageManager control.


User Comments
No comments yet, sign in to comment.