Guides & Tutorials (beta)
ActiveX Component Distribution
Codejock ActiveX components are standalone .OCX files that must be copied and registered on the target computer where they will be used. One component (.OCX) file exposes a set of classes and interfaces necessary for using controls it provides. The controls can be used from any development environment and with any programming language that supports ActiveX technology.
The way to work with ActiveX components and related language dependent concerns are beyond this article as it is unique to each programming language. It is assumed that a developer is familiar with ActiveX concepts and best practices related to a programming language of his choice.
This article explains the following related concerns:
- Choosing the correct component configuration
- Registering components
- Versioning components
- Licensing components
- Known issues and work arounds
Choosing The Correct Component Configuration
Each Codejock ActiveX component comes in 3 configurations:
- 32-bit ANSI
- 32-bit Unicode
- 64-bit Unicode
Component file names reflect its configuration, e.g.:
- Codejock.ChartPro.v18.0.1.ocx - 32-bit ANSI
- Codejock.ChartPro.Unicode.v18.0.1.ocx - 32-bit Unicode
- Codejock.ChartPro.Unicode.x64.v18.0.1.ocx - 64-bit Unicode
It is important to choose the correct configuration that is compatible with your host application as Windows does not allow mixing the bitness of modules in one address space old programming languages do not support Unicode character set.
The possible installation options are:
- Installing 32-bit ANSI components only if your application does not support Unicode, e.g. Visual Basic 6 application or 32-bit C++ application with Multi-Byte character set enabled.
- Installing 32-bit Unicode components only if your application does support Unicode, e.g. C# application with x86 TargetCPU, 32-bit Microsoft Office application or 32-bit C++ application with Unicode character set enabled
- Using both 32-bit and 64-bit Unicode components if your application is a 64-bit application, e.g. C# application with x64 or AnyCPU TargetCPU, 64-bit Microsoft Office application or 64-bit C++ application with Unicode character set enabled.
It is important to install 32-bit Unicode components even if they are not used as Windows OS requires all 64-bit COM objects to have corresponding 32-bit components installed. - Also three configurations may be installed in order to cover all possible use cases.
Components may be installed to any location that is at least read-only accessible for all potential users of the installed components.
Registering Components
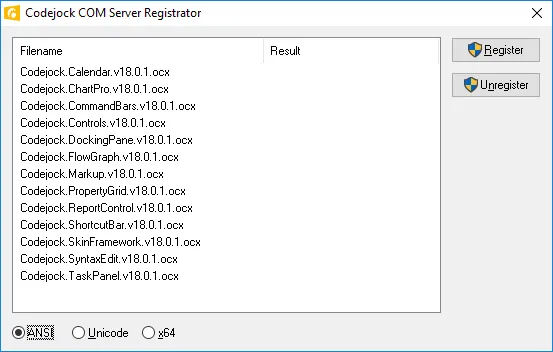
It is not enough to just copy component files to the target location to be able to use it, they must be registered and license included (described in the next section). Even after installing either SuitePro or a standalone ActiveX component on a development machine the necessary configurations must be registered prior to using the components.
Component registration on the development machine can be done using the Registrator tool included in the installation package. Typically it can be found at the following location: %ProgramFiles(x86)%\Codejock Software\ActiveX\Xtreme SuitePro ActiveX v18.0.1\Bin\Registrator.exe

If a component is distributed along with the application every .OCX module must be registered during application installation. Typically this can be achieved by using %SystemRoot%\System32\regsvr32.exe tool executed as Administrator, for example using this command line for silent Calendar registration:
regsvr32.exe /s Codejock.Calendar.v18.0.1.OCX
or this command line for unregistering Calendar component silently:
regsvr32.exe /s /u Codejock.Calendar.v18.0.1.OCX
It is important to understand that a target machine where components should be registered may already have Codejock components of the same version registered. While there is no harm to re-register components of the same version, but in case an application that uses Codejock components gets uninstalled, unregistering components may break other applications that depend on those components. There are 2 ways to work around this issue:
- Leave Codejock components intact during application uninstallation. This will pollute but provides the best stability guarantee with no extra effort.
- Add a bootstrapper to your application that will ensure necessary components to be registered right before application is executed. In case an unregistered component is detected the bootstrapper trigger re-installation flow.
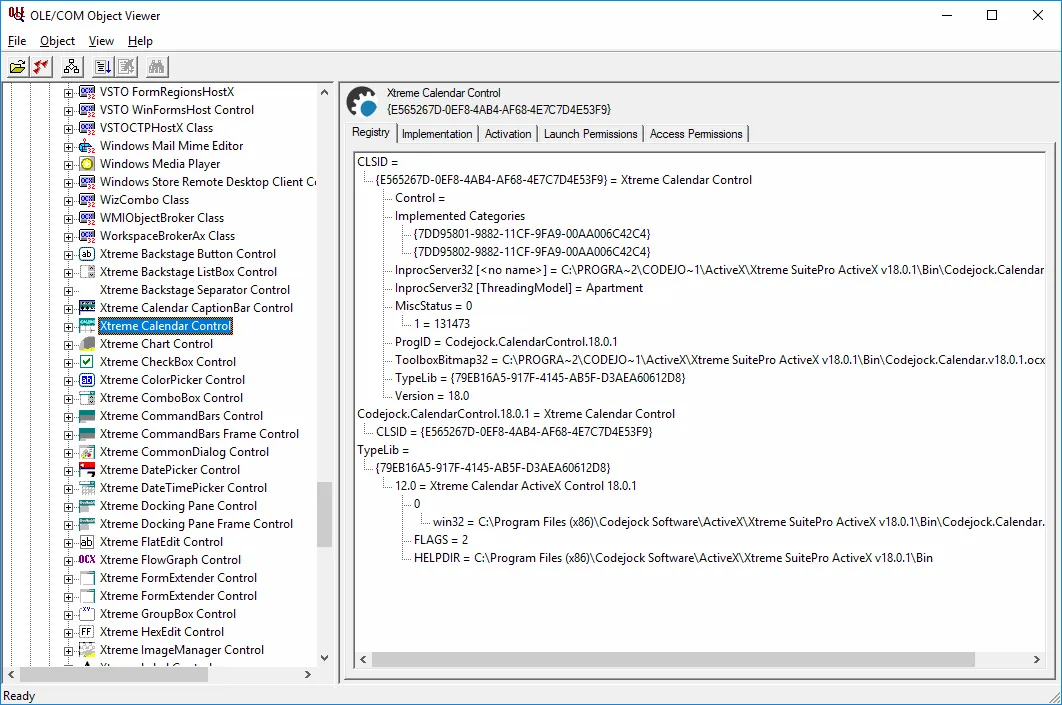
If necessary to review Codejock component registration manually the standard OLE View tool from Windows SDK can be used:

Versioning Components
Every ActiveX component has a set of unique class, interface and type library IDs associated with it registered to the system. In order to avoid version collisions all Codejock components have their IDs regenerated with each new version.
While this ensures that 2 or more installations of the same component but different versions can co-exist in the same system independently, it makes component upgrade process on a development machine a bit more complicated than just installing a newer version. Depending on the development environment and programming languages this situation can be resolved in different ways and with different side-effects.
For example, Visual Basic 6 IDE during project loading can determine that a referenced component have a newer version available and prompt to upgrade existing components automatically. Unfortunately Microsoft Office is not as flexible as Visual Basic 6 IDE when it comes to ActiveX component upgrade, it does not prompt to upgrade automatically, instead it just uses the current component version or does not instantiate a control at all if its registration does not exist, even if a newer version is available. In such a case the only way to upgrade controls is removing old controls and insert new ones with re-storing previous properties.
Licensing Components
All Codejock ActiveX components require to have a valid license in order to function. ActiveX license should not be confused with paid subscription, it is just a small text file .LIC , one per .OCX file that has to be distributed along with .OCX file, it does not imply any additional fee.
There are two ways of including license when you distribute Codejock components along with your application:
- As a separate .LIC file (preferable)
- Embedded into the application
Distributing license as a separate .LIC file
This is a preferable and the easiest way of distributing the license. All is needed is just to copy .LIC file for each .OCX component into the same location. Using this method guarantees that the license will be picked up by the component if exists. Unlike embedding a license into an application, no cross-module issues are possible.
For example, you install Codejock Calendar ActiveX components for both 32- and 64-bit platforms as part of your application to %ProgramFiles(x86)%\\\bin directory, then bin directory should contain the following files:
- Codejock.Calendar.v18.0.1.OCX
- Codejock.Calendar.Unicode.v18.0.1.OCX
- Codejock.Calendar.Unicode.x64.v18.0.1.OCX
- Codejock.Calendar.v18.0.1.LIC
Should you want to include CommandBars components, you also need to copy Codejock.CommandBars.v18.0.1.LIC to the same location.
Distributing license embedded into the application
There are cases when distributing a separate .LIC file is not possible, e.g. when you develop an ActiveX component for a web-browser or any other sort of a remote client. In this case the only option is to embed the license text into the application.
In a cross-module scenario this method should be used with extreme caution and is prone to unexpected behavior as different environments manage such scenarios in different ways. For example, if you develop a Visual Basic application that does not use the Report control, but instead it uses another custom control that does use the Report control, the license for the Report control must be set from the hosting application, not from the custom control. In such cases it is recommended to distribute license as a separate .LIC file.
The way it works, each component exposes its own GlobalSettings class which has the string License property. This property must be set to the verbatim value of the first 3 string of the corresponding .LIC file up to the first empty line, including all spaces and new lines. It is important to use CRLF as a new line separator (0Dh, 0Ah byte sequence, or "\r\n" escape sequence) as it is used in .LIC file.
The property must be assigned as early as possible in the application initialization flow. For Visual Basic it can be the beginning of Form_Initialize, for .NET applications it can be the beginning of the main window constructor. It is important to assign this property before any other explicit or implicit call to the component is made.
Here is an example of how to do it:
Private Sub Form_Initialize()

    CommandBarsGlobalSettings.License = _
    "CommandBars Control Copyright (c) 1998-2017 Codejock Software" & vbCrLf & _
    "PRODUCT-ID: Codejock.CommandBars.ActiveX.v18.0" & vbCrLf & _
    "VALIDATE-CODE: XXX-XXX-XXX-XXX"

End Sub
public frmMain()
{
    XtremeCommandBars.CommandBarsGlobalSettingsClass CommandBarsSettings =
        new XtremeCommandBars.CommandBarsGlobalSettingsClass();

    CommandBarsSettings.License =
        "CommandBars Control Copyright (c) 1998-2017 Codejock Software\r\n" +
        "PRODUCT-ID: Codejock.CommandBars.ActiveX.v18.0\r\n" +
        "VALIDATE-CODE: XXX-XXX-XXX-XXX";

    //
    // Required for Windows Form Designer support
    //
    InitializeComponent();

}
Public Sub New()
    MyBase.New()

    Dim CommandBarsSettings As _
    XtremeCommandBars.CommandBarsGlobalSettingsClass = _
        New XtremeCommandBars.CommandBarsGlobalSettingsClass

    CommandBarsSettings.License = _
        "CommandBars Control Copyright (c) 1998-2017 Codejock Software" + ControlChars.CrLf + _
        "PRODUCT-ID: Codejock.CommandBars.ActiveX.v18.0" + ControlChars.CrLf + _
        "VALIDATE-CODE: XXX-XXX-XXX-XXX"

    'This call is required by the Windows Form Designer.
    InitializeComponent()

    'Add any initialization after the InitializeComponent() call

End Sub
Known Issues And Work Arounds
Updating .NET references
In some cases when a project that references Codejock ActiveX components is opened on a computer other than it was created on, or a project was created with an older version of Visual Studio, or if only a newer version of components is available, form initialization flow may fail at the end with COM exception. There can be various reasons, the most common one is that Interop assemblies created for Codejock ActiveX component by another Visual Studio instance do not match available components. The steps below may help with resolving this issue:
- Make sure the correct components are installed and registered, and registered component configuration matches TargetCPU from project properties (refer to Choosing The Correct Component Configuration and Registering Components at the beginning of this article).
- Open your project and close all windows, especially resource and form designers.
- Open project references and remove 2 references per Codejock component, e.g. if your project uses CommandBars only, you'll have 2 related references:
- XtremeCommandBars - An Interop assembly for the CommandBars component
- AxXtremeCommandBars - ActiveX control library for the CommandBars component
- Save and re-build the project. It is expected to fail with some or many errors.
- Open Visual Studio Toolbox, click right mouse button in any empty space and pick Choose Items from the pop-up menu.
- Go to the COM Components tab and set checkmarks next to the controls for which type libraries were remove, for example set checkmark next to Xtreme CommandBars Control, make sure its path points to the correct location, then press OK. You should see new Toolbox buttons added for each selected control.
- Go to Solution Explorer and add a new temporary form to the project, the name does not matter.
- Drop one control per removed component reference onto the temporary form from the Toolbox. As you drop you'll see new references being automatically generated and added to you project. It may be a time consuming process depending on your hardware and OS performance.
- Save the project and re-build, this time there should be no compilation errors related to the references previously removed. If you do see new compilation errors caused by the new components, it is possible an interface has changed or in some rare cases Visual Studio fixes public property or method names of the referenced component, e.g. it can generate name
OcxStatefor a property named asState. - Run the project under debugger to make sure form initialization no longer fails.
- Delete the temporary form previously created.


User Comments
No comments yet, sign in to comment.